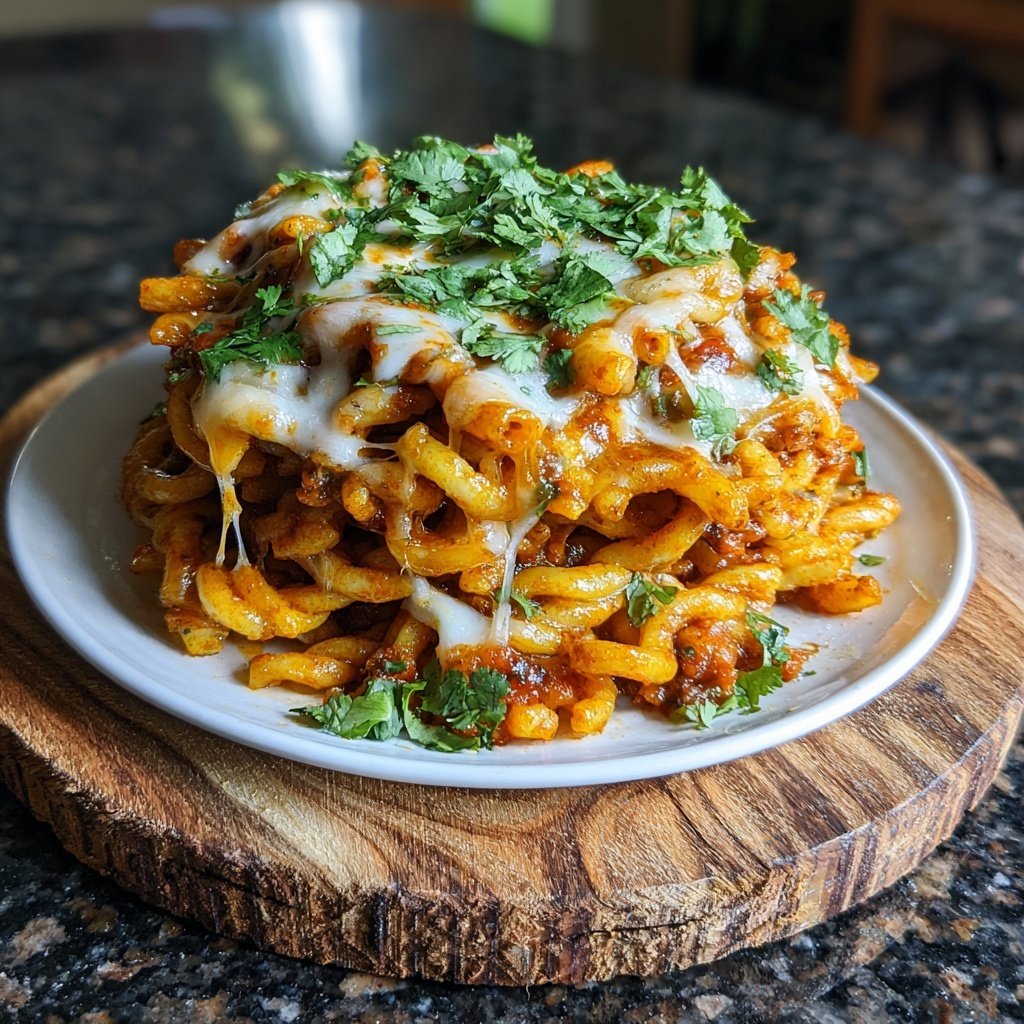
Crispy Taco Pasta Crunch
Highlighted under: Global Gourmet Recipes
I absolutely love creating dishes that blend comfort food with a bit of crunch, and Crispy Taco Pasta Crunch is one of my favorites. The combination of pasta and taco flavors is a match made in heaven, and the crispy topping adds an irresistible texture. It’s a quick, easy meal that keeps my family coming back for more. Whether served as a main dish or a hearty side, I know this recipe will become a staple in your kitchen, just like it has in mine.
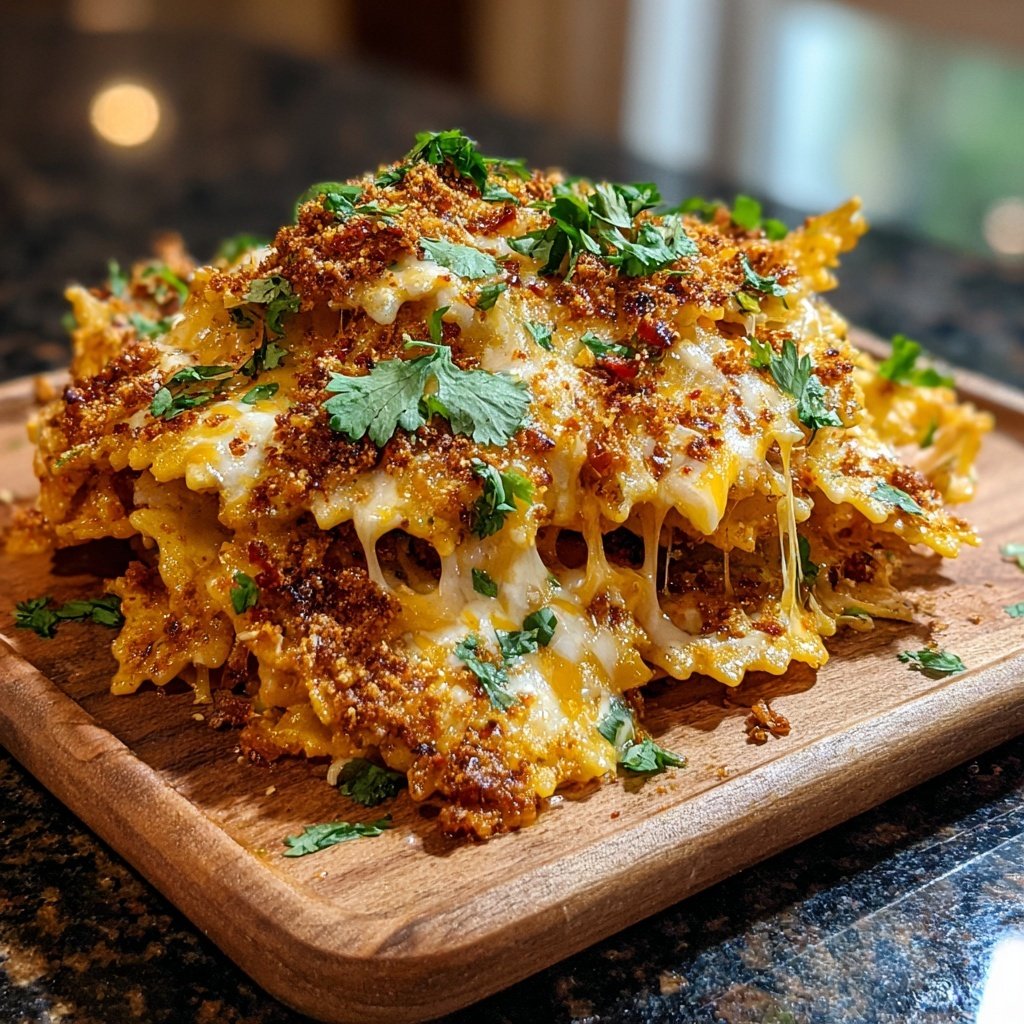
When I first stumbled upon the idea of combining pasta with taco ingredients, I was intrigued. I decided to experiment in the kitchen, and the results were nothing short of amazing! I found that adding crunchy tortilla strips not only enhanced the flavor but also provided a satisfying texture to each bite. This dish is not just about taste; it’s an experience for the palate.
I love mixing spices and fresh ingredients in the dish. The secret to perfect seasoning is to adjust the spices according to your taste. I recommend starting light, then adding more cumin or chili powder until you find the perfect balance. Enjoy your culinary adventure!
Why You'll Love This Recipe
- A delightful fusion of pasta and taco flavors
- Crunchy toppings that add texture and excitement
- Quick and easy to prepare, perfect for busy nights
Mastering the Pasta Texture
To achieve the perfect pasta texture in your Crispy Taco Pasta Crunch, cooking the elbow macaroni until just al dente is crucial. This ensures the pasta retains some firmness even after baking. Typically, this means boiling for 6 to 8 minutes, depending on the brand. Remember to monitor closely; as soon as you bite into a piece, it should have a slight resistance without being mushy, which will help it stand up to the taco mixture and crispy topping.
It's also important to rinse the pasta briefly under cold water after draining. This can prevent the noodles from sticking together in the baking dish and losing their individuality, allowing each piece to absorb the flavorful taco sauce without becoming clumped. A little extra care goes a long way in enhancing the dish's overall texture.
Elevating the Flavor Profile
While the taco seasoning gives a solid base of flavor, consider boosting the overall taste with additional spices or ingredients. For instance, a pinch of cumin or smoked paprika can add depth, while chopped jalapeños can provide a spicy kick. If you're using fresh tomatoes, opt for vine-ripened varieties for a juicy flavor burst. They can add a fresh, vibrant quality that complements the richer elements in the dish beautifully.
Don’t shy away from experimenting with cheese either. While cheddar or a Mexican blend is delicious, a dollop of cream cheese mixed in before baking can create a creamy, luxurious texture that contrasts nicely with the crunch. I recommend stirring it into the pasta mixture just before adding it to the baking dish for maximum creaminess.
Ingredients
Gather the following ingredients to create a flavorful and crunchy dish that the whole family will enjoy!
Ingredients
- 8 ounces elbow macaroni
- 1 pound ground beef or turkey
- 1 packet taco seasoning
- 1 cup diced tomatoes (canned or fresh)
- 1 cup shredded cheese (cheddar or Mexican blend)
- 1 cup crushed tortilla chips
- 1/2 cup diced onion
- 1/2 cup sour cream
- Chopped cilantro for garnish
- Salt and pepper to taste
Once you have everything ready, you can start making your crispy taco pasta crunch!
Instructions
Follow these easy steps to prepare your delicious Crispy Taco Pasta Crunch!
Cook the Pasta
In a large pot of salted boiling water, cook the elbow macaroni according to the package instructions until al dente. Drain and set aside.
Prepare the Taco Mixture
In a skillet over medium heat, add the ground beef or turkey and onion. Cook until browned, about 5-7 minutes. Drain excess fat, then stir in the taco seasoning and diced tomatoes. Simmer for about 5 minutes.
Combine Pasta and Taco Mixture
Add the cooked pasta to the skillet with the taco mixture. Stir in half of the shredded cheese and mix until well combined.
Add Crunchy Topping
Preheat your oven to 350°F (175°C). Transfer the mixture to a baking dish and sprinkle the remaining cheese and crushed tortilla chips over the top. Bake for 15 minutes or until the cheese is melted and the chips are golden.
Serve and Enjoy
Once out of the oven, let it cool slightly. Serve with a dollop of sour cream and garnish with chopped cilantro.
This dish is perfect for any weeknight dinner!
Pro Tips
- For added flavor, consider mixing in some black beans or corn. You can also substitute the protein with a plant-based alternative for a vegetarian version.
Storing and Reheating
If you find yourself with leftovers, storing your Crispy Taco Pasta Crunch is straightforward. Allow the dish to cool completely, then transfer it to an airtight container. It can be kept in the refrigerator for up to 3 days. However, to maintain that crispy topping, consider reheating in the oven rather than the microwave. Preheat your oven to 350°F (175°C), cover the dish loosely with foil, and bake for about 15 minutes until heated through, removing the foil in the last 5 minutes to regain some crunch.
If you'd like to make this dish ahead of time, you can assemble the pasta and taco mixture and keep it in the fridge for a day before baking. Just wait to add the crushed tortilla chips until you're ready to bake. This method allows the flavors to develop and can make dinnertime a breeze.
Serving Suggestions
Crispy Taco Pasta Crunch is versatile when it comes to serving options. You can enjoy it as a standalone meal, but pairing it with a refreshing side salad can elevate the dining experience. A simple salad with arugula, cherry tomatoes, and a zesty lime vinaigrette complements the richness of the dish beautifully. Alternatively, consider serving it alongside some guacamole and salsa for a complete taco-inspired feast.
For a fun twist, make individual servings in small, oven-safe dishes. Layer the pasta mixture and toppings in each dish for a personalized plate that guests can dig into. This not only enhances presentation but also keeps the leftovers manageable, as individual portions can be reheated without the risk of losing that irresistible crunch on top.
Questions About Recipes
→ Can I make this recipe ahead of time?
Absolutely! You can prepare the taco mixture in advance. Just reheat it and combine with the cooked pasta right before baking.
→ How do I store leftovers?
Store any leftovers in an airtight container in the refrigerator for up to 3 days. Reheat in the oven or microwave before serving.
→ Can I use a different type of pasta?
Yes, feel free to use any pasta shape you prefer! Penne or fusilli both work well.
→ Is it possible to make this dish vegetarian?
Definitely! Just replace the meat with beans or lentils and use vegetable broth for extra flavor.
Crispy Taco Pasta Crunch
Created by: The Chefeliaskitchen Team
Recipe Type: Global Gourmet Recipes
Skill Level: Easy
Final Quantity: 4 servings
What You'll Need
Ingredients
- 8 ounces elbow macaroni
- 1 pound ground beef or turkey
- 1 packet taco seasoning
- 1 cup diced tomatoes (canned or fresh)
- 1 cup shredded cheese (cheddar or Mexican blend)
- 1 cup crushed tortilla chips
- 1/2 cup diced onion
- 1/2 cup sour cream
- Chopped cilantro for garnish
- Salt and pepper to taste
How-To Steps
In a large pot of salted boiling water, cook the elbow macaroni according to the package instructions until al dente. Drain and set aside.
In a skillet over medium heat, add the ground beef or turkey and onion. Cook until browned, about 5-7 minutes. Drain excess fat, then stir in the taco seasoning and diced tomatoes. Simmer for about 5 minutes.
Add the cooked pasta to the skillet with the taco mixture. Stir in half of the shredded cheese and mix until well combined.
Preheat your oven to 350°F (175°C). Transfer the mixture to a baking dish and sprinkle the remaining cheese and crushed tortilla chips over the top. Bake for 15 minutes or until the cheese is melted and the chips are golden.
Once out of the oven, let it cool slightly. Serve with a dollop of sour cream and garnish with chopped cilantro.
Extra Tips
- For added flavor, consider mixing in some black beans or corn. You can also substitute the protein with a plant-based alternative for a vegetarian version.
Nutritional Breakdown (Per Serving)
- Calories: 480 kcal
- Total Fat: 24g
- Saturated Fat: 10g
- Cholesterol: 85mg
- Sodium: 550mg
- Total Carbohydrates: 45g
- Dietary Fiber: 4g
- Sugars: 3g
- Protein: 26g